
Fashion Sketching: a Step-past-step Guide to Drawing the Basic Fashion Croquis with nine Heads Proportions | For Beginners
Cartoon the way figure doesn't have to exist challenging. In this tutorial, you lot will acquire a simple method to create a professional croquis, one pace at a time!
I've broken this tutorial into sections:
Part ane: Creating guidelines
Part 2: Drawing the croquis skeleton
Office three: Adding shape
Earlier we get into it, let's answer some questions…
What is a style Croquis?
A Croquis is a drawing of a fashion model that you lot trace over to design habiliment. You lot tin also call it a way figure or template.
Fashion croquis can be all different shapes, sizes, and styles. Information technology all depends on the terminate use of your blueprint and the demographic you are designing for. I've used different croquis throughout my career. Some were more than stylized while others were super simple.
(P.Due south. If y'all want to accept the pressure off of creating your own croquis and start designing right away, cheque out this 9-heads female figure Croquis Kit I made.)
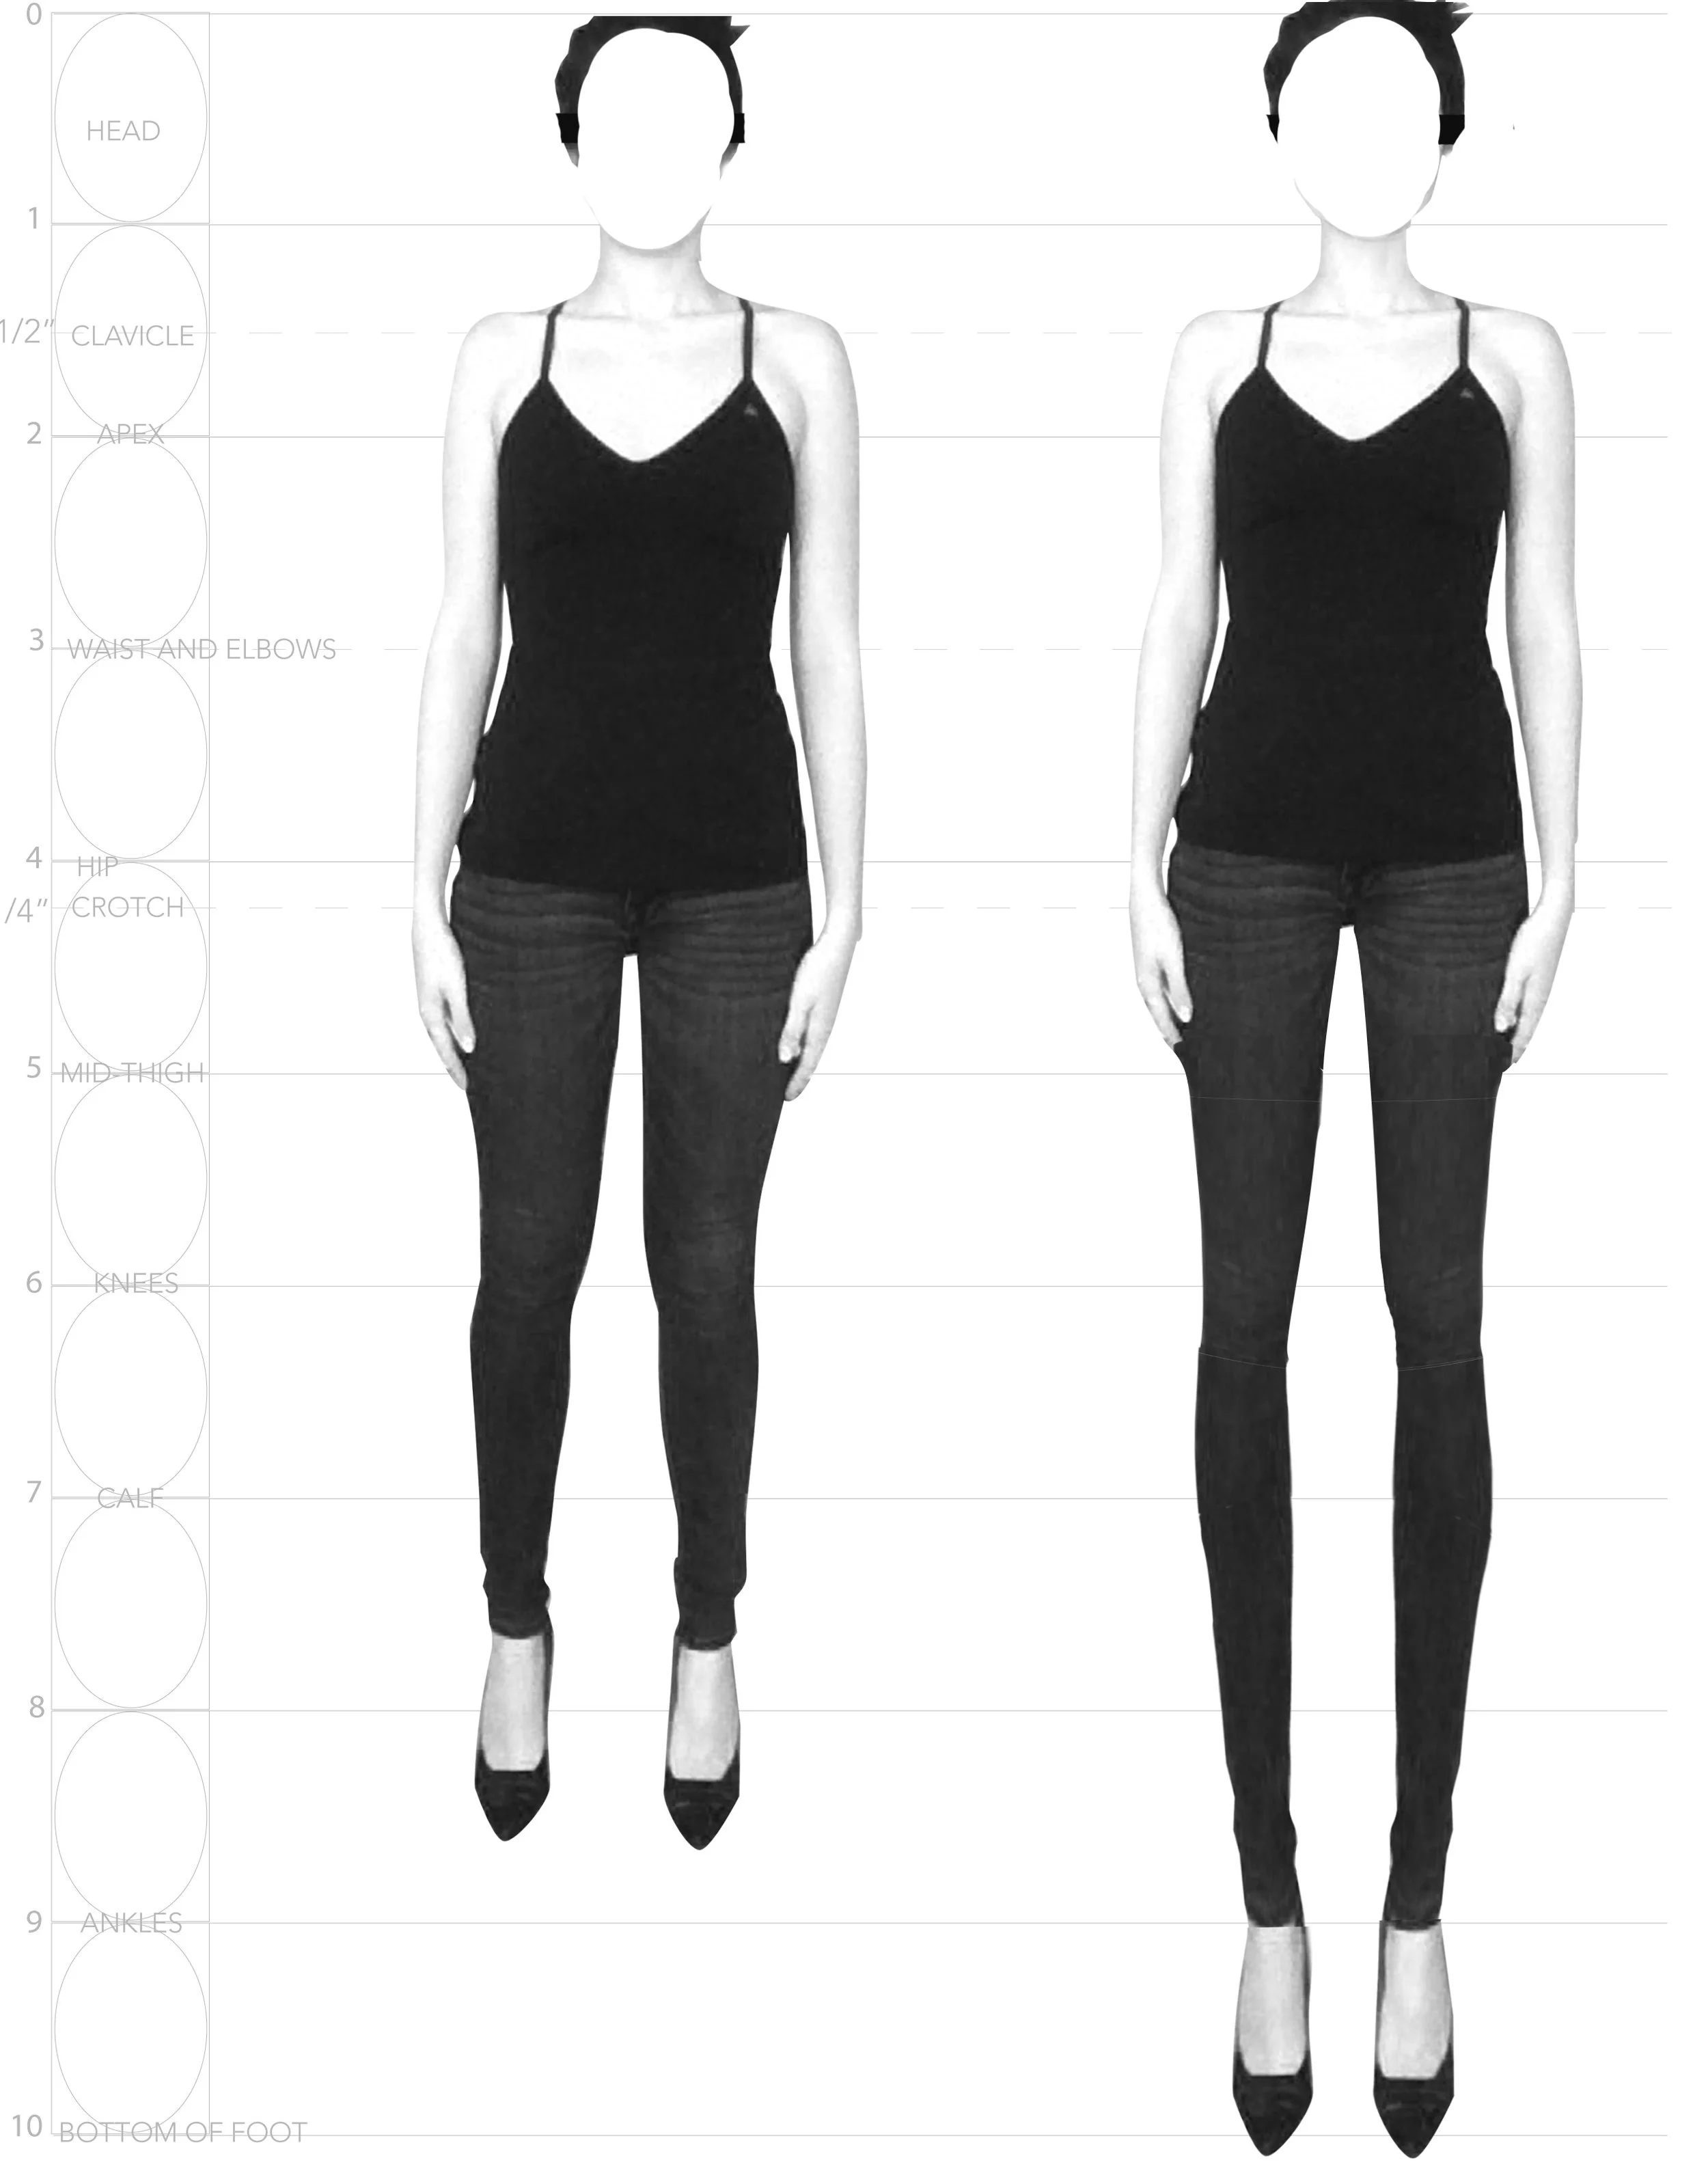
The above image illustrates the departure between a realistic body (left) and a fashion croquis with 9 heads proportion (right)
What are the Proportions of a Fashion Croquis?
I will demonstrate how to draw a "9 heads" croquis. The croquis is ix heads tall from the summit of the head to the ankles, which is much more elongated than the average woman. (The anxiety are excluded from the equation since they can vary in height depending on the type of shoes and heel height.)
A 9 heads model exaggerates the proportions of a way model to display apparel in an elongated and dramatic scale.
Even so, fashion models can, and should, take diverse body proportions, so I encourage y'all to evolve your croquis to exist whatever shape and size.
This tutorial will teach y'all how to create the 9-heads croquis (with the proportions taught in fashion colleges) but y'all can arrange the proportions subsequently to best fit your target demographic.
What Does "9 heads" Tall Mean?
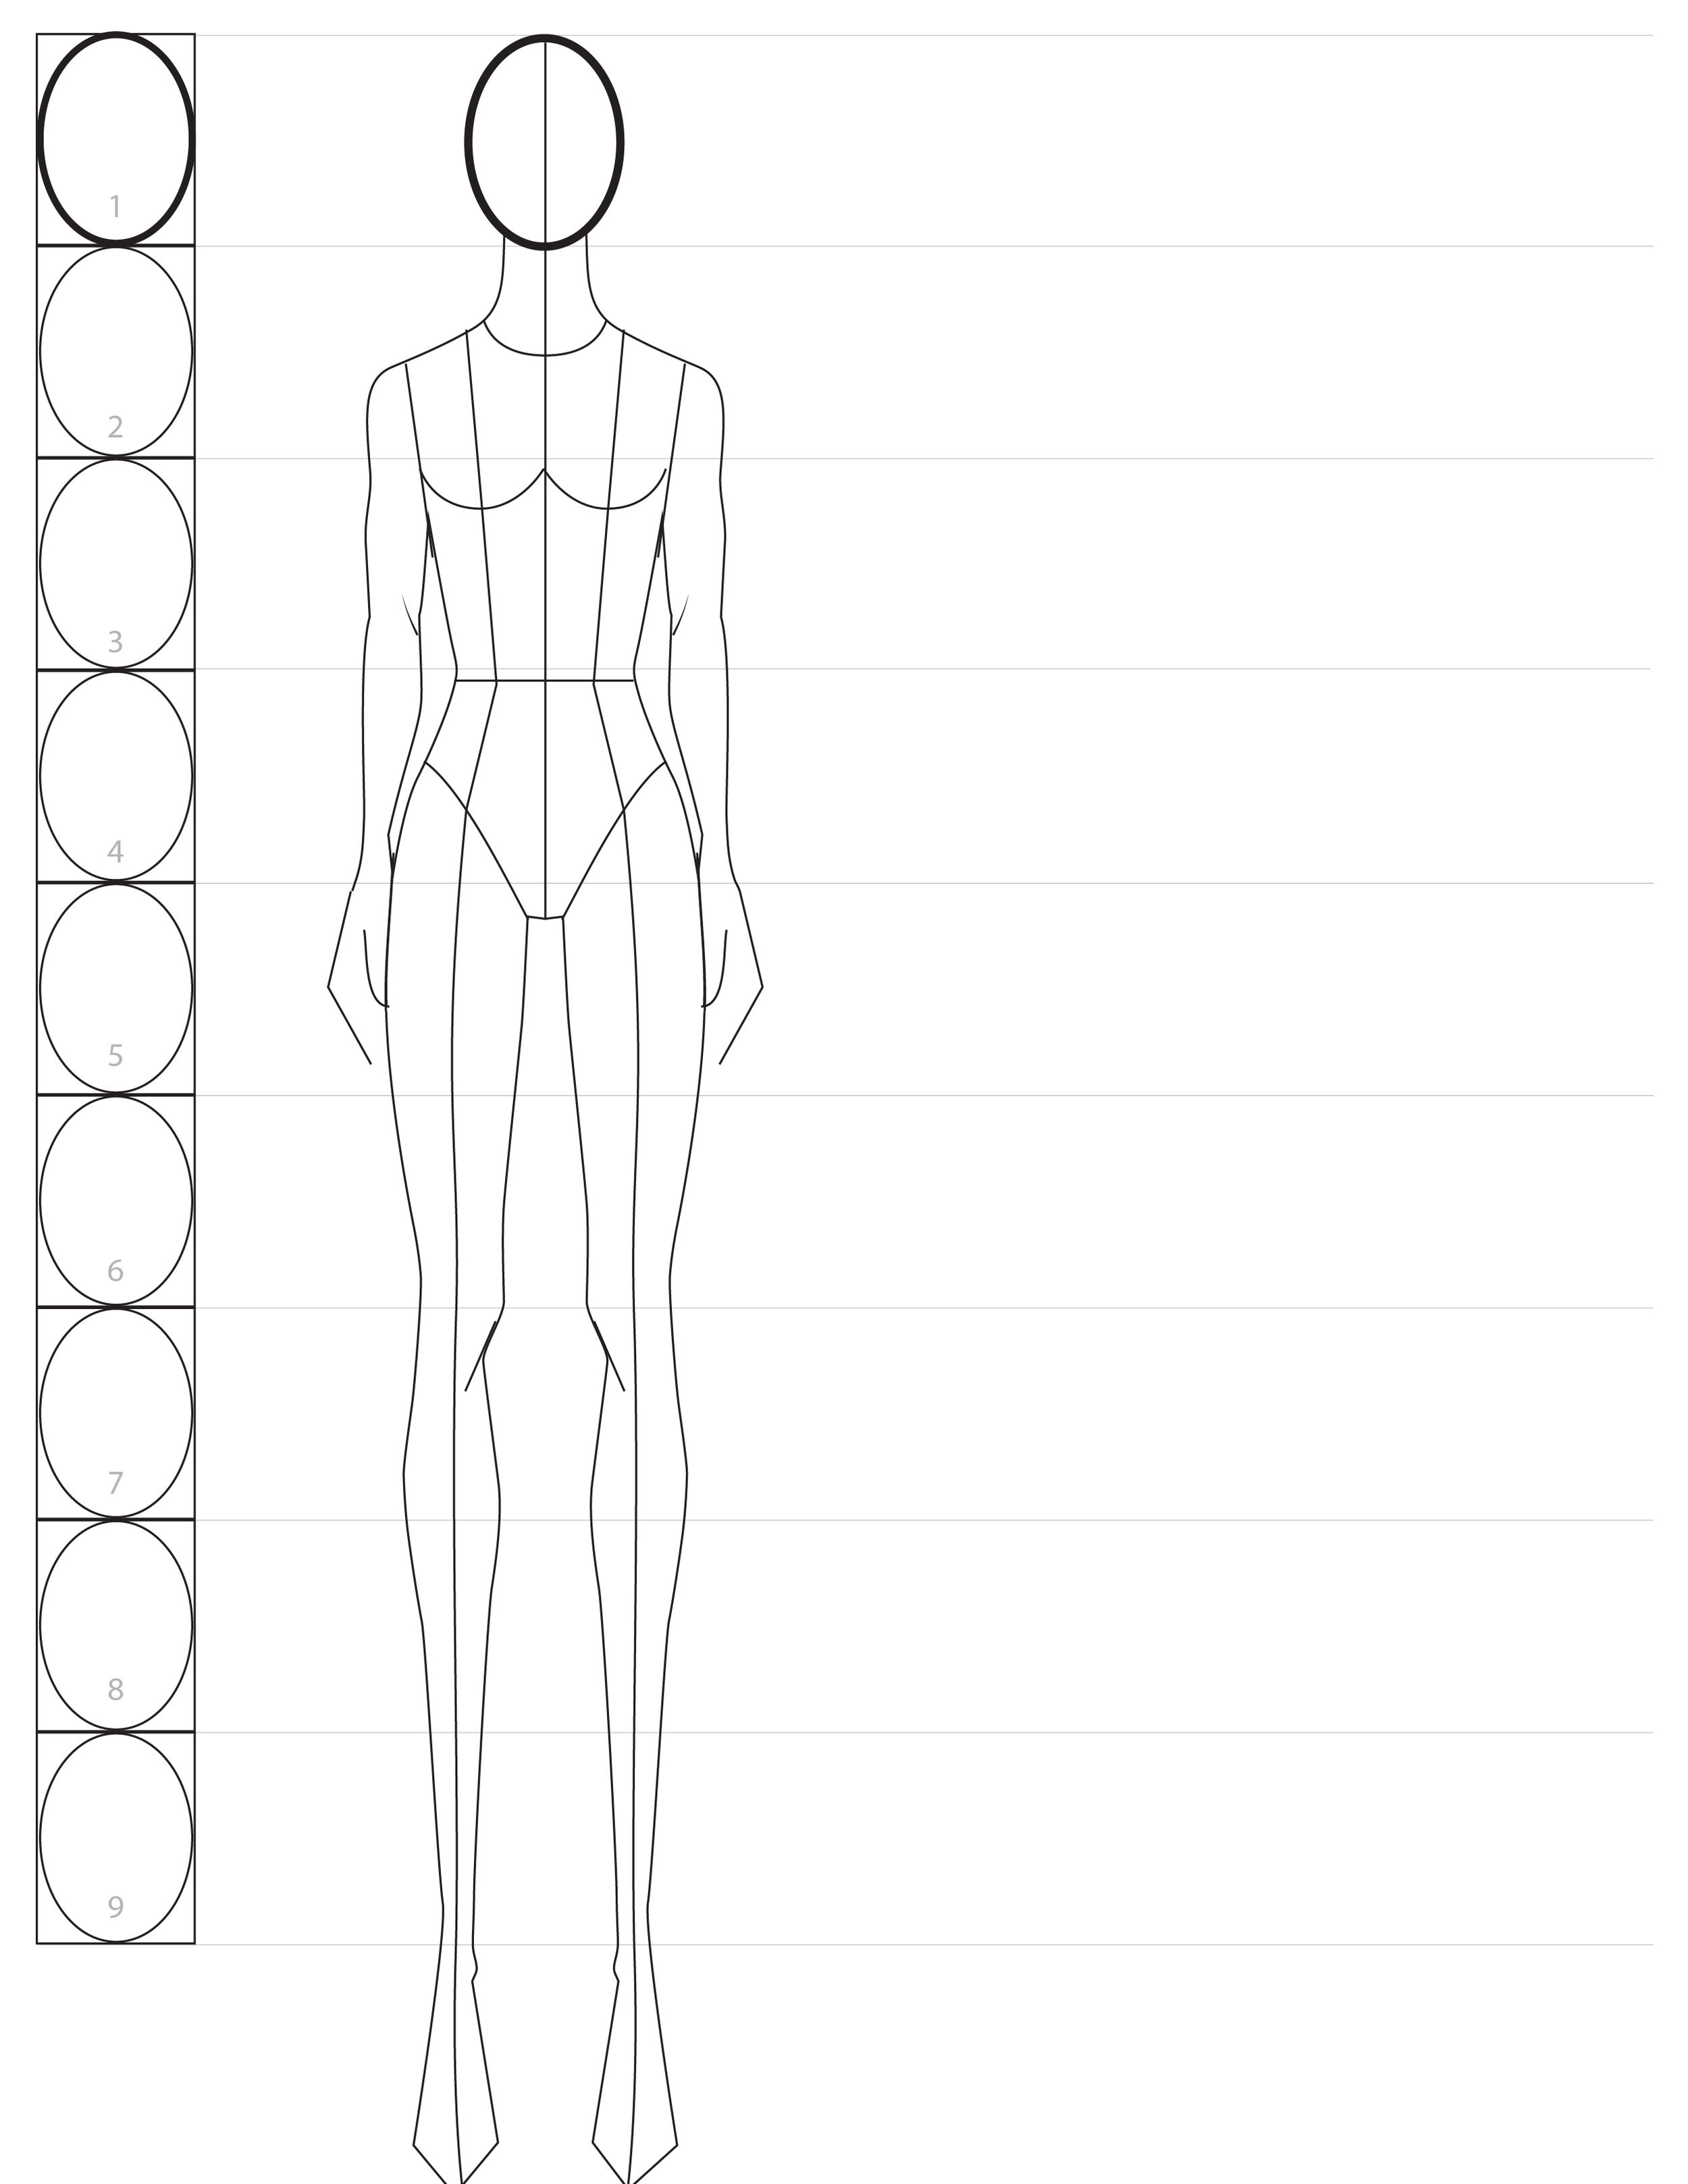
The height and width of the head is used as an index for the dimensions of the residue of the body.
In this prototype, you lot can meet how the body is cleaved upwardly into 9 equal sections from the peak of the head to the talocrural joint bone. The anxiety are excluded considering they can vary in pinnacle depending on the type of shoes and heel meridian.
It's helpful to use the head equally a point of measure instead of an bodily measurement because your paper size tin can vary. From a tiny slice of paper to a billboard, yous can map out the size and proportions of your figure by drawing nine heads first.
If you are working with an 8.5 x 11 piece of paper, you tin can accept each head be roughly 1" tall but this measurement will change depending on your paper size.
Let's Begin the Tutorial!
Before we begin, yous will need paper, a pencil, and a ruler (or any straight edge.) Tracing paper would be helpful but isn't necessary. Draw lightly with pencil and then you can erase hands.
Office 1: Creating Guidelines
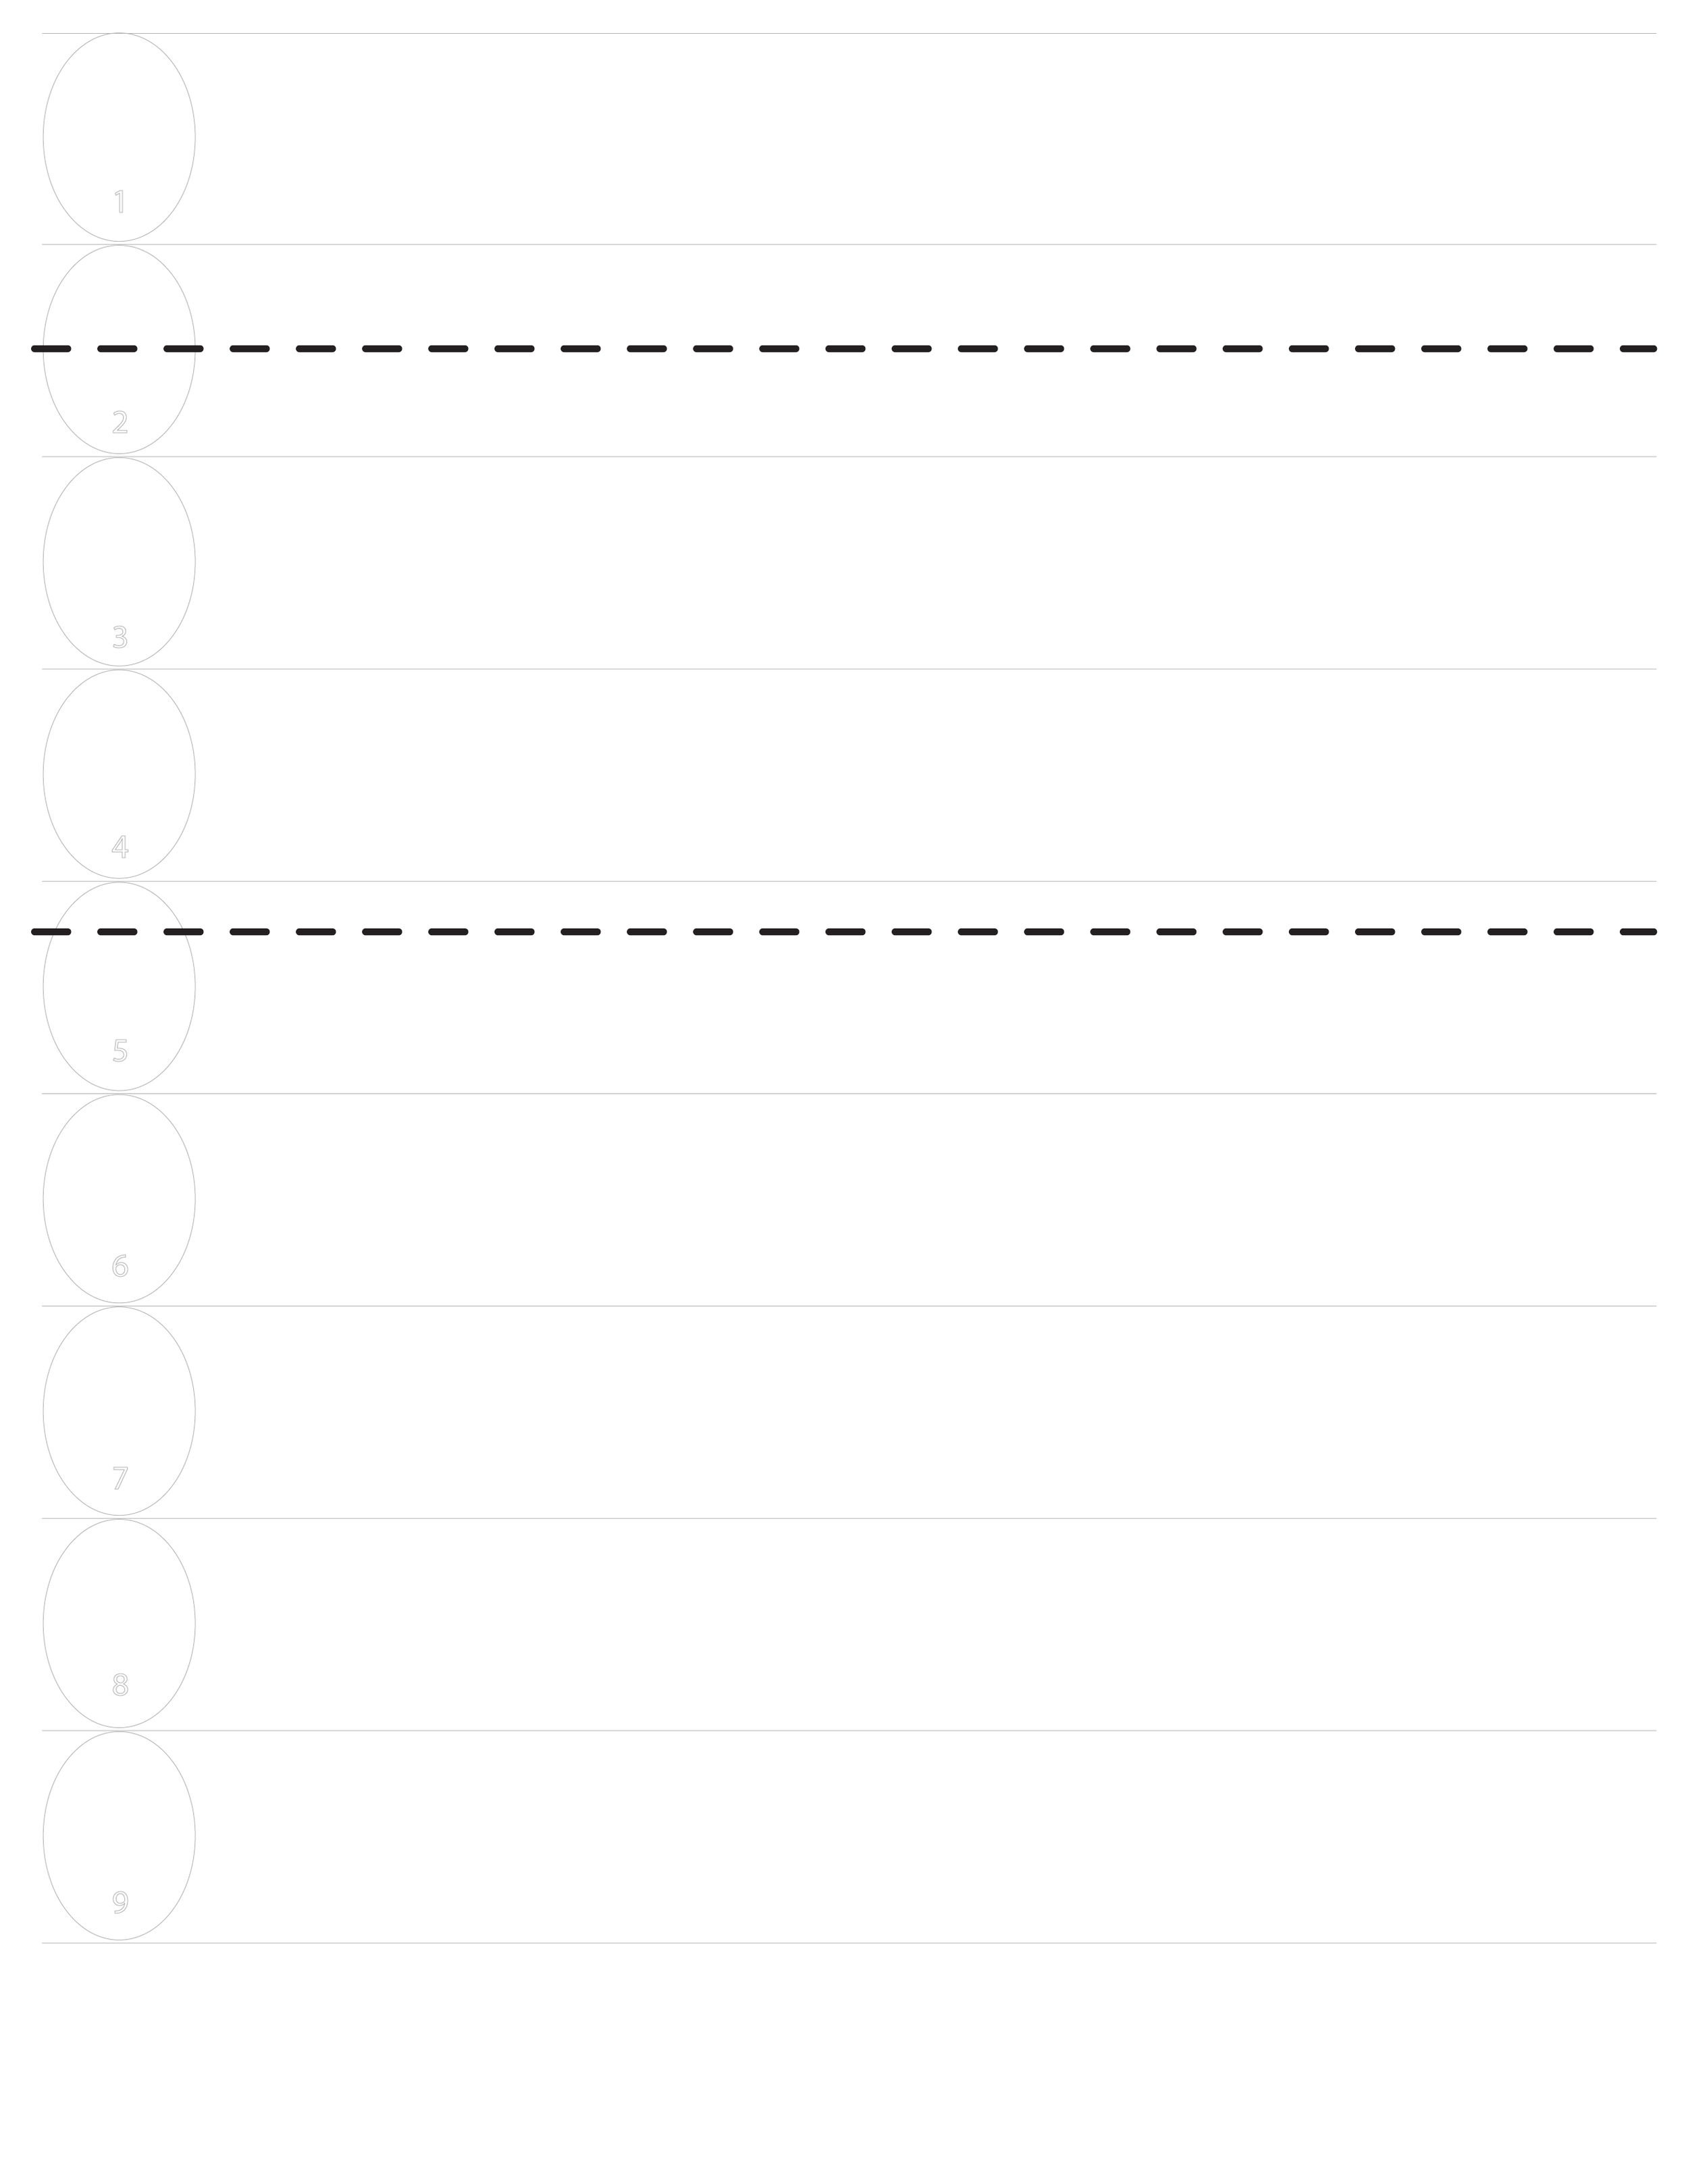
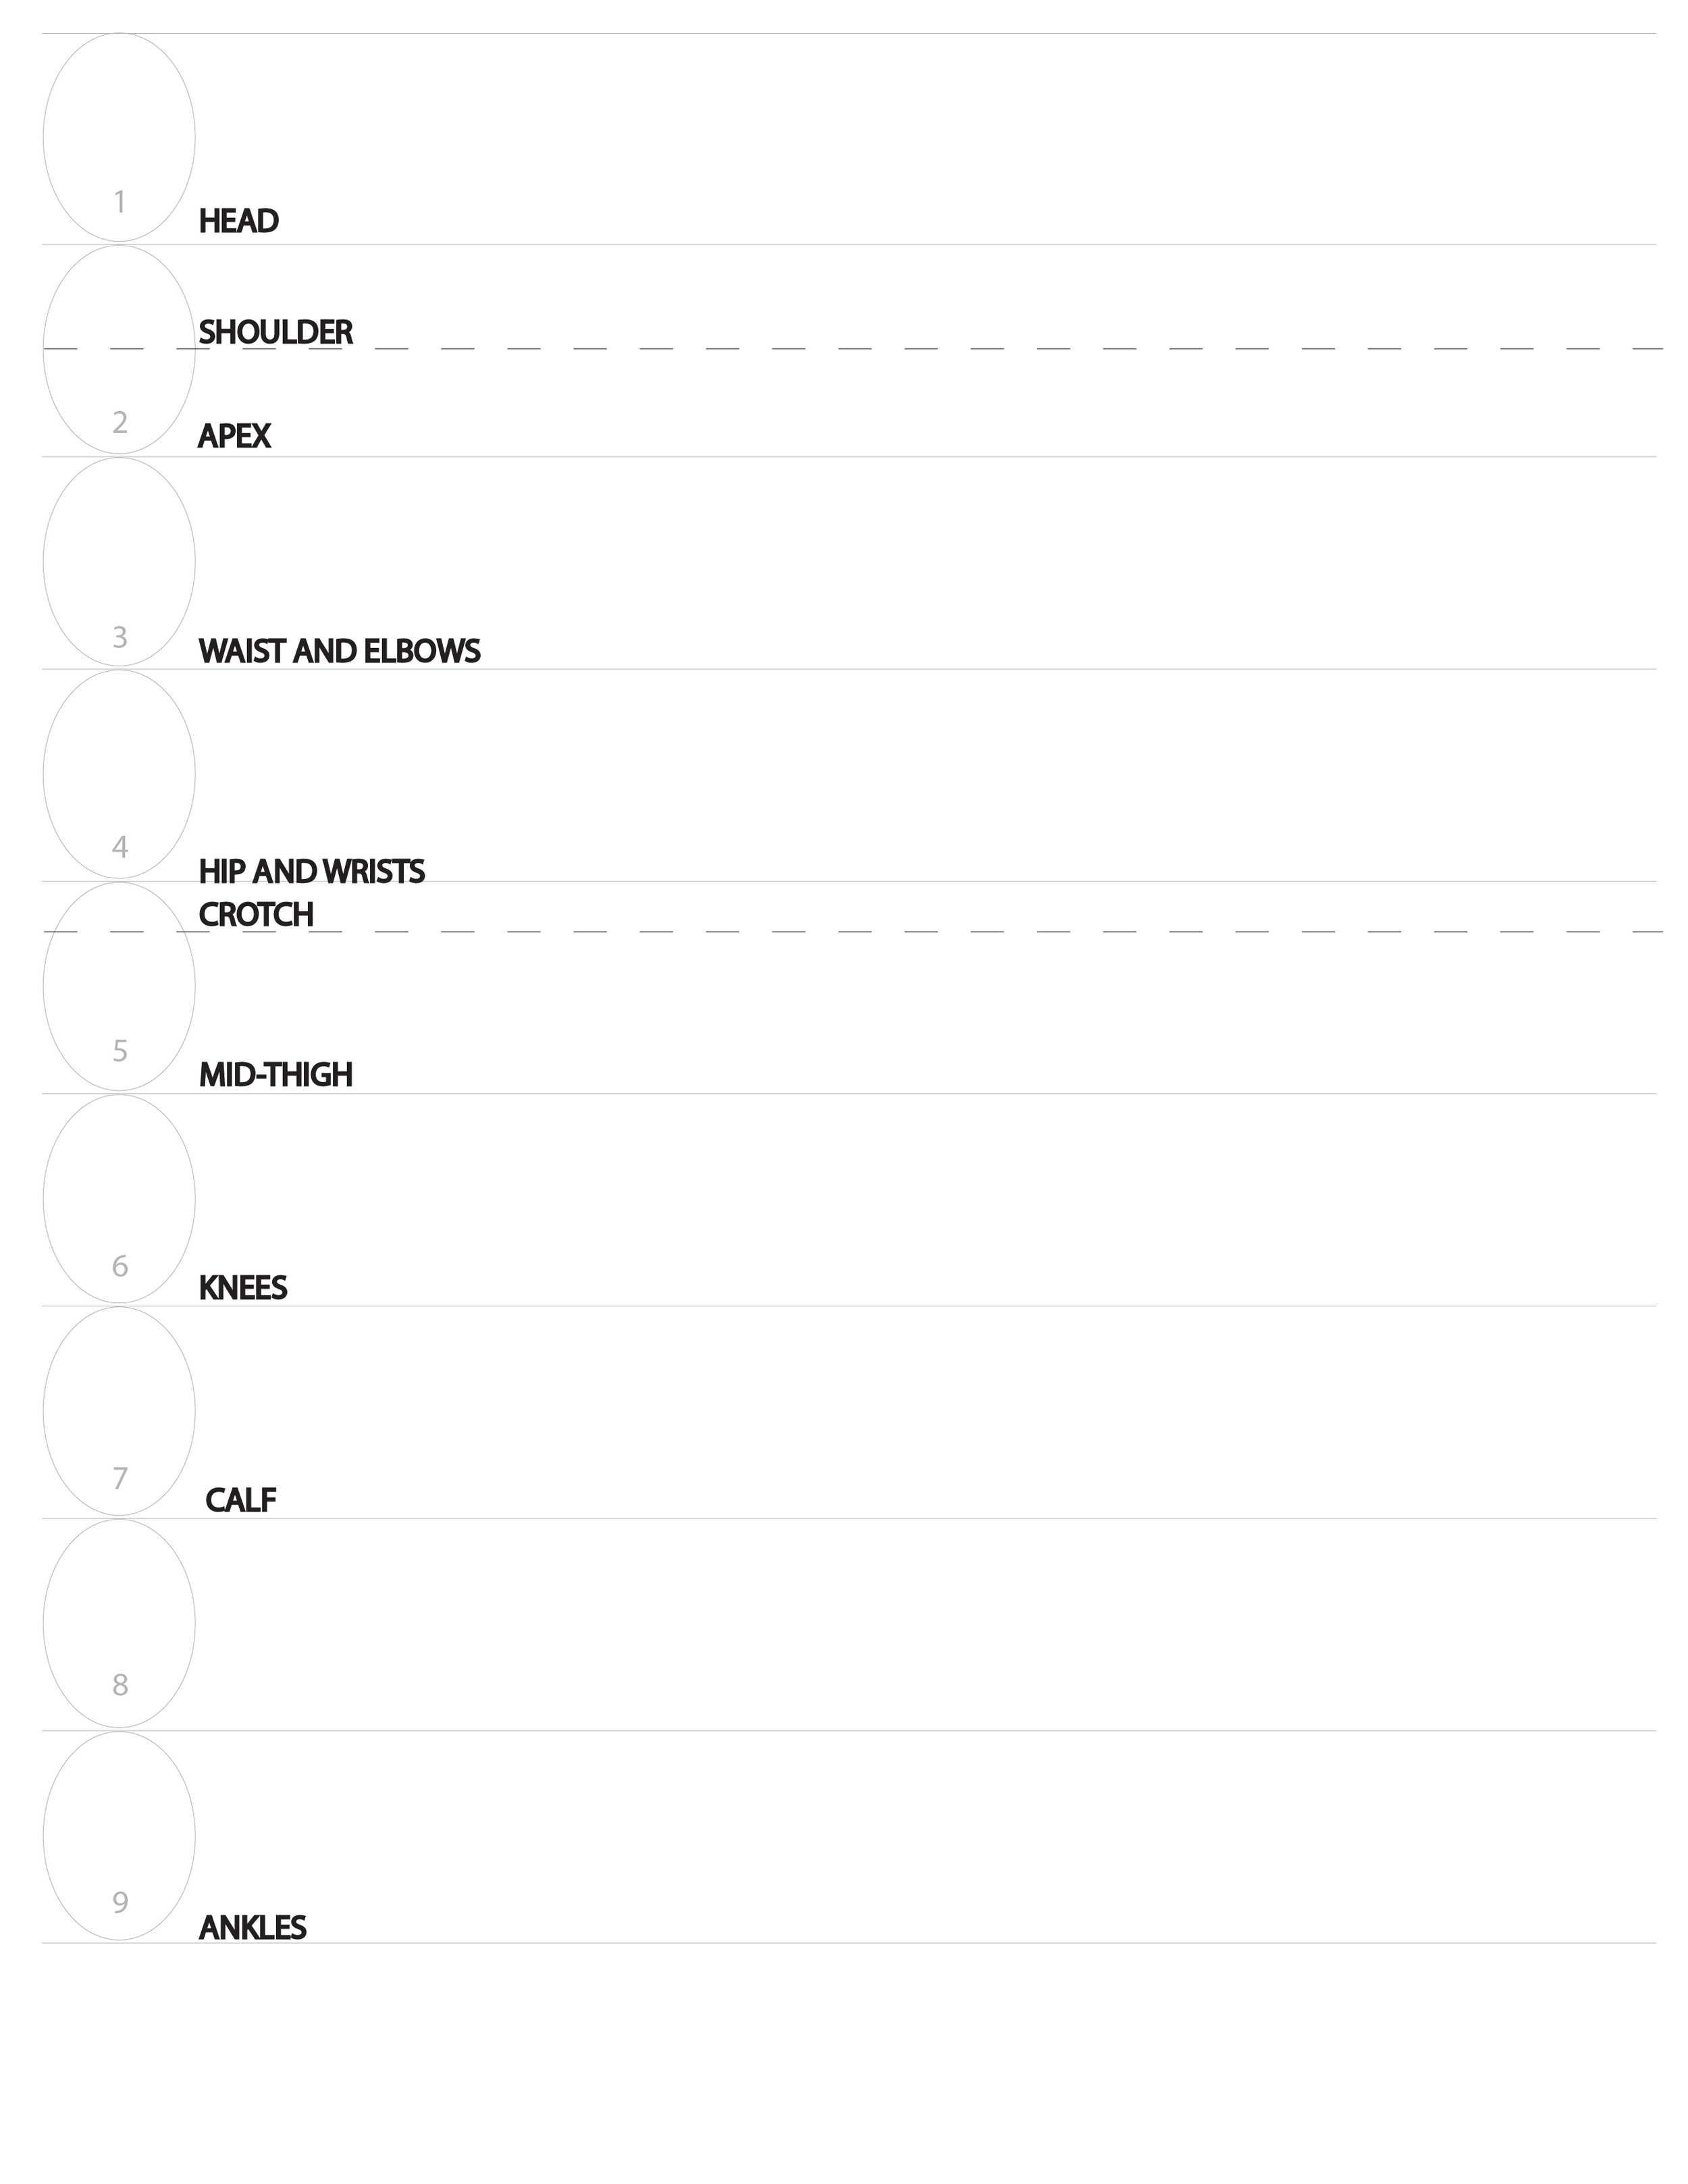
Step 1: Draw nine heads that are roughly the same shape and size and label one-nine (leave some space at the bottom of the page for the feet.)

Step 2: Draw horizontal lines betwixt each head (brand sure they are straight)

Step 3: Add together a dashed line at roughly 1 1/2" and 4 1/4" heads
Step 4: Label anatomy as marked on this page
Role two—Drawing the Croquis Skeleton
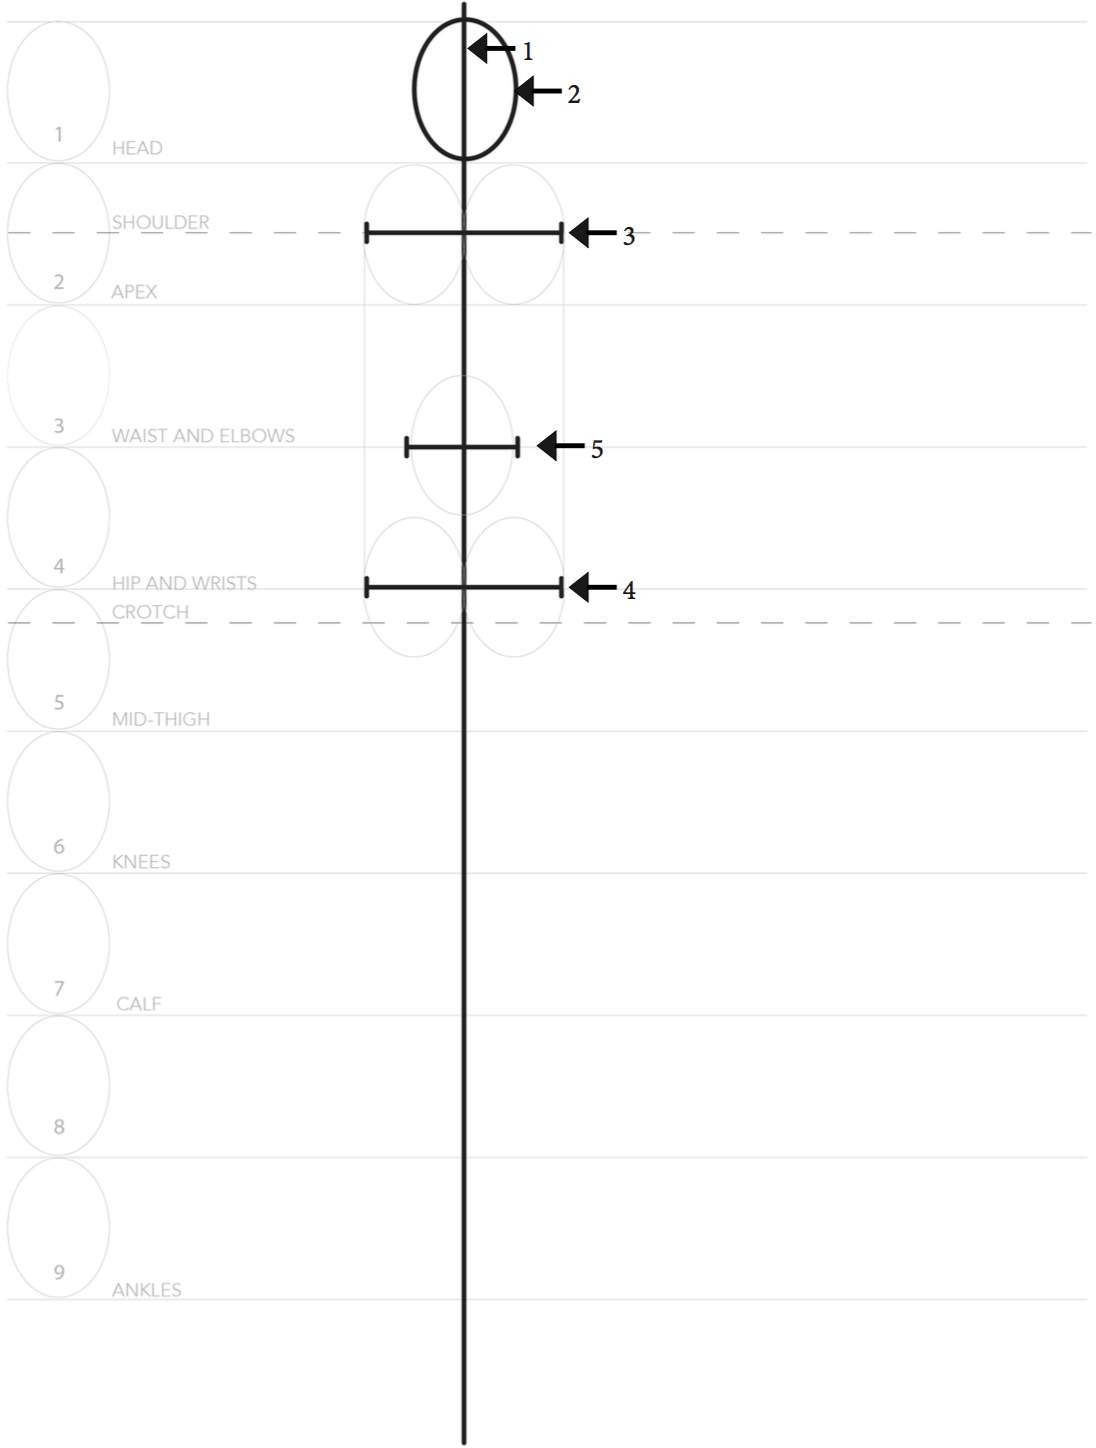
Footstep one: Draw a vertical line, perpendicular to the horizontal guidelines. This will exist the heart line
Footstep ii: Draw an oval for the head
Step 3: Draw a horizontal line for the shoulders (roughly 2" heads wide)
Step 4: Repeat stride 3 for the hips (the hips and shoulders are the same width)
Step five: Draw a horizontal line for the waist (roughly 1 head width)
Step half dozen: Connect the shoulder, waist and hips
Step 7: Draw a guideline for the arms as pictured
Stride 8: Depict a vertical line from the waist down
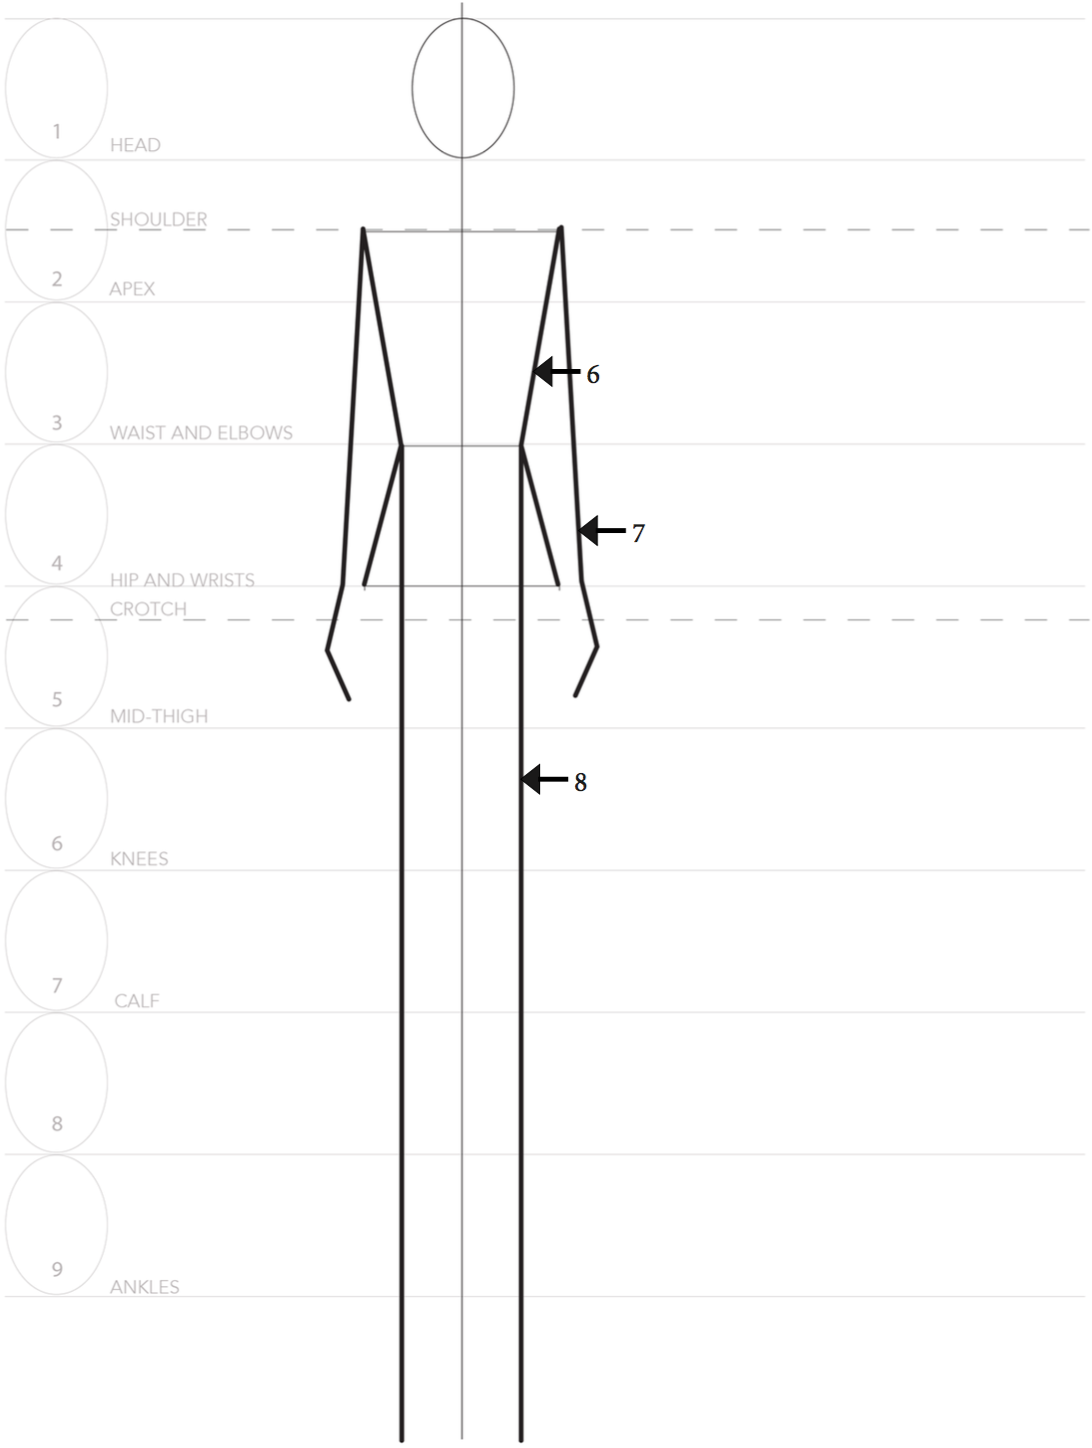
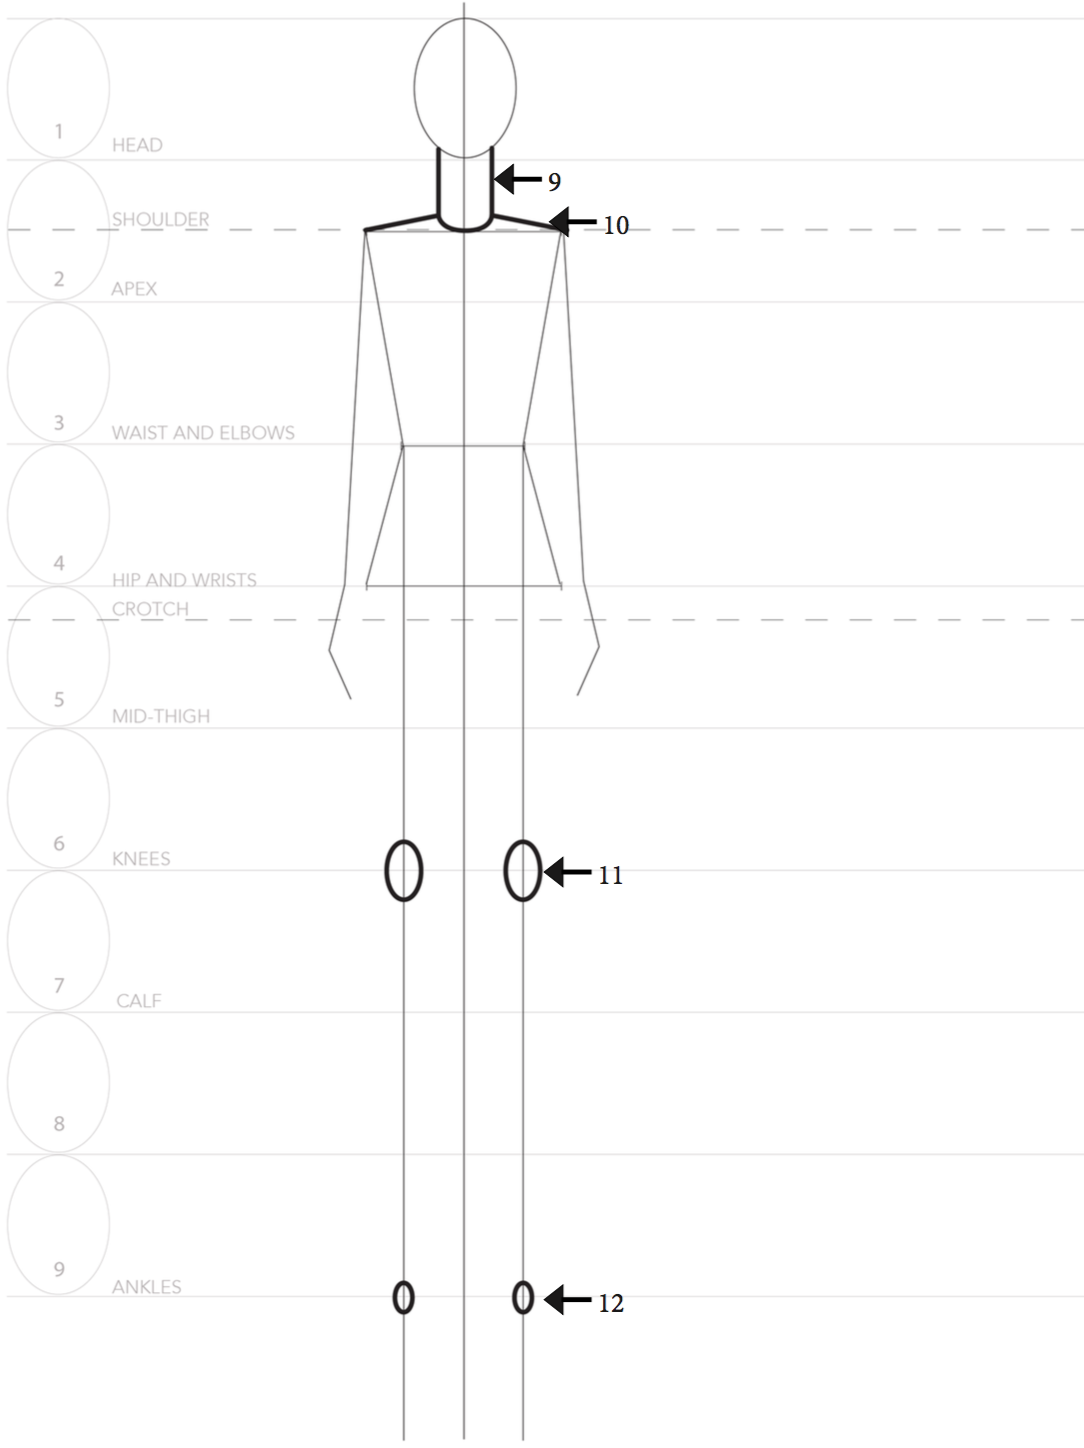
Stride 9: Draw a cylinder for the cervix
Stride 10: Connect the cervix to the shoulder
Pace xi: Draw small ovals for the knees
Step 12: Describe small ovals for the ankles
Part 3—Calculation Shape
After the skeleton of the croquis is established, we tin add muscular structure and shape. Have your time and draw lightly so you can erase easily.
Step 1: Depict ovals for the shoulder, bicep, and lower arm
Step 2: Depict ovals for the upper and lower leg
Step 3: Draw triangles for the feet
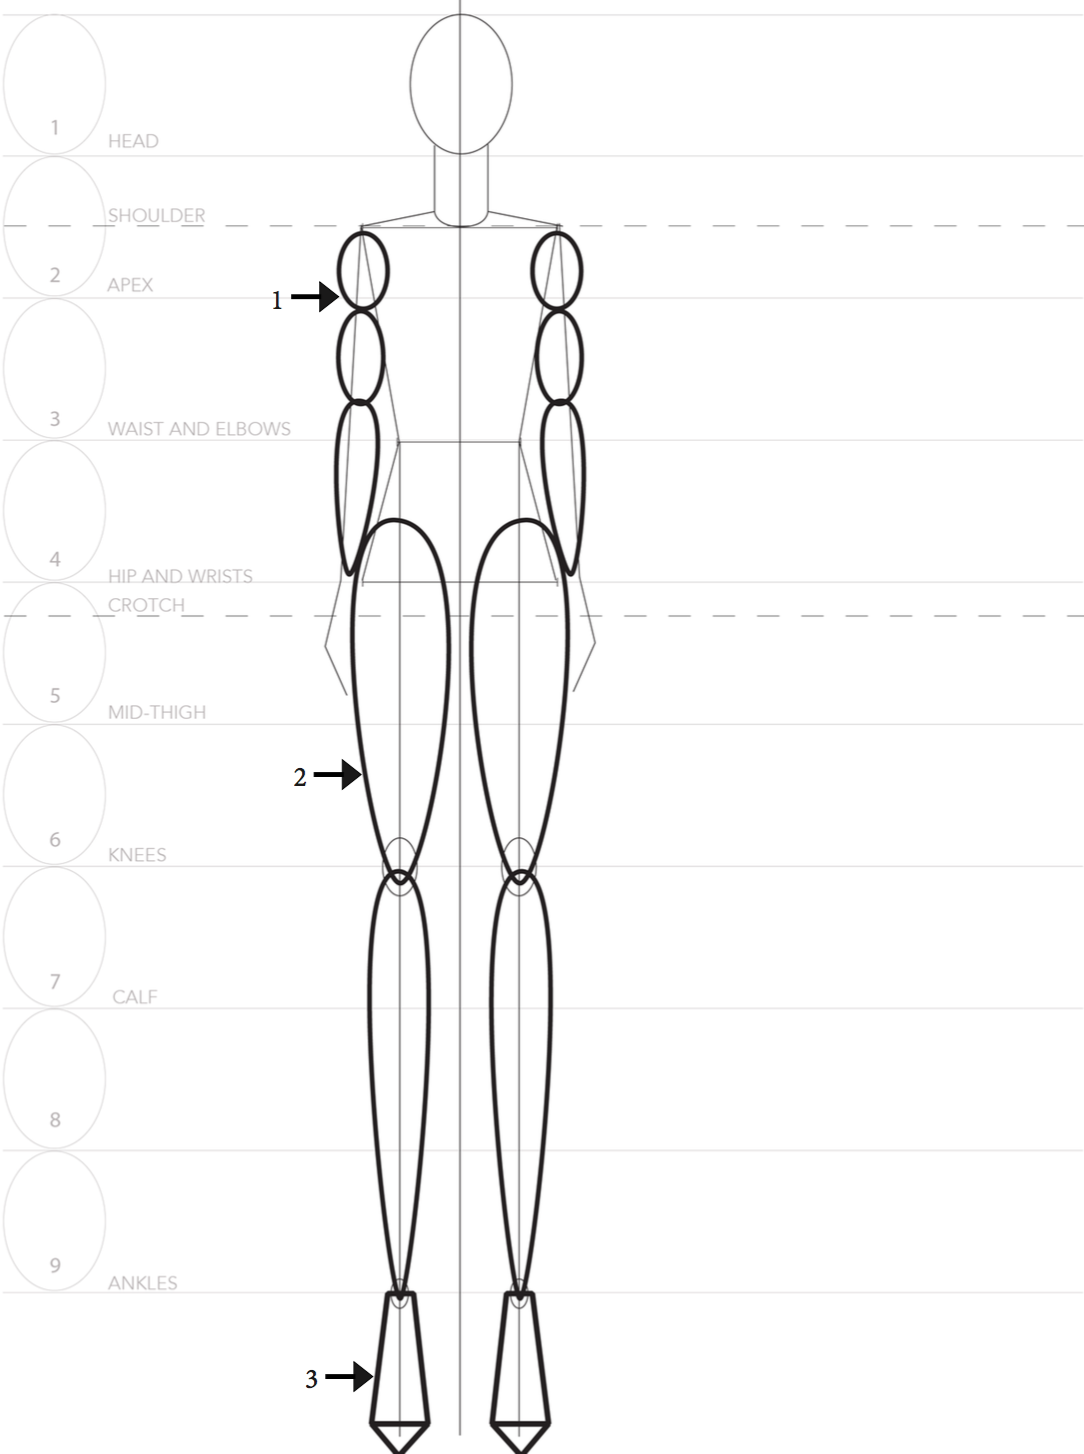
Step iv: Add together shape to the neck and outline the arm, using the ovals as guidelines. Repeat on other side

Step five: Outline the leg and foot as illustrated, using the ovals as guidelines. Repeat on other side

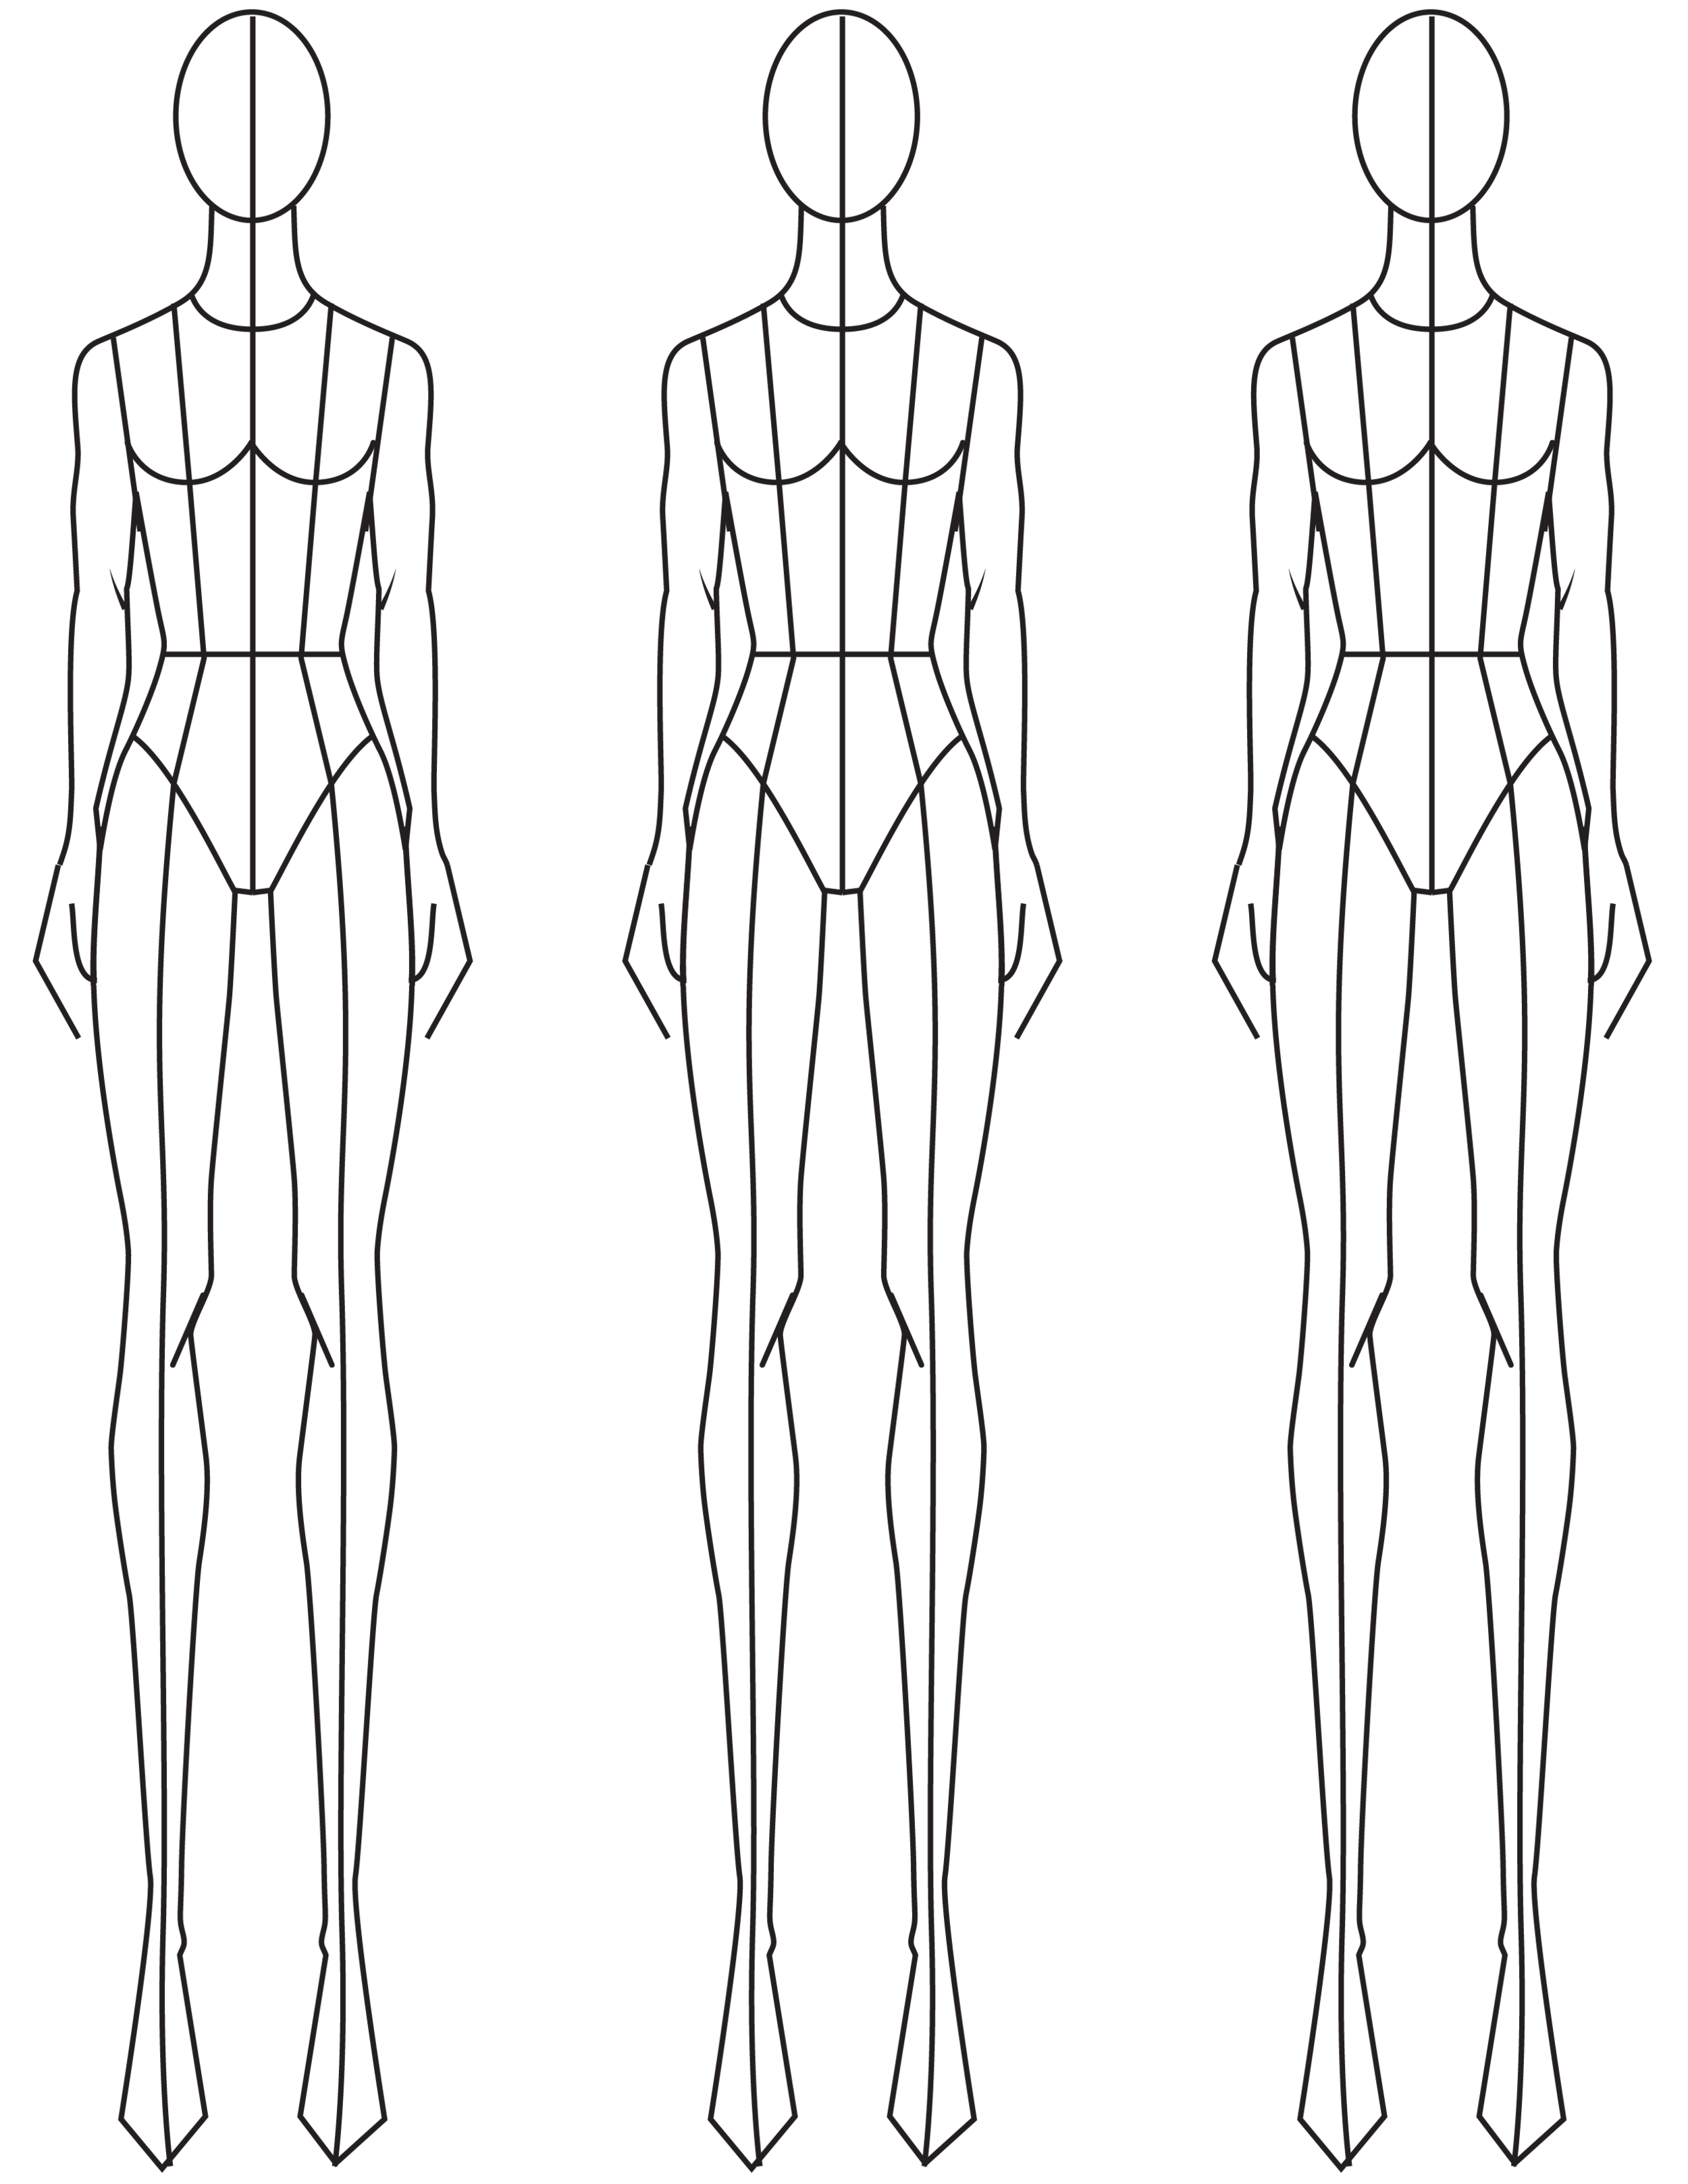
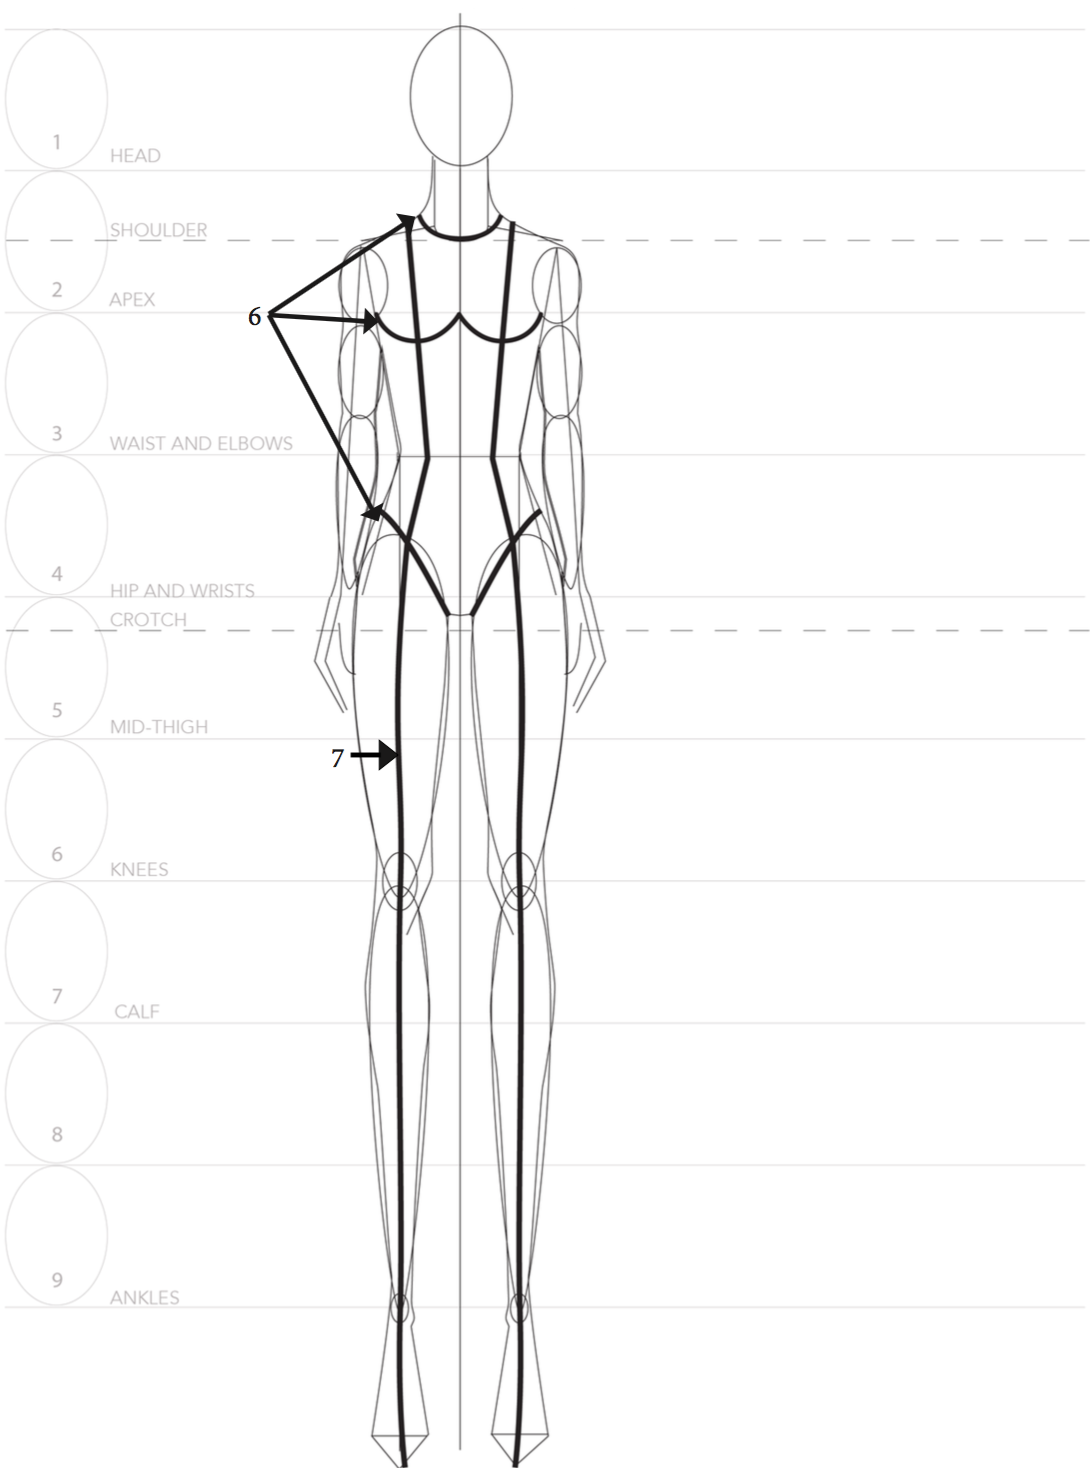
Stride vi: Add neck, bust, and underwear line every bit illustrated.
Pace 7: Add middle line at each side of trunk as equally illustrated. This is called the "princess line."
* These seam lines are helpful guidelines when drawing apparel*
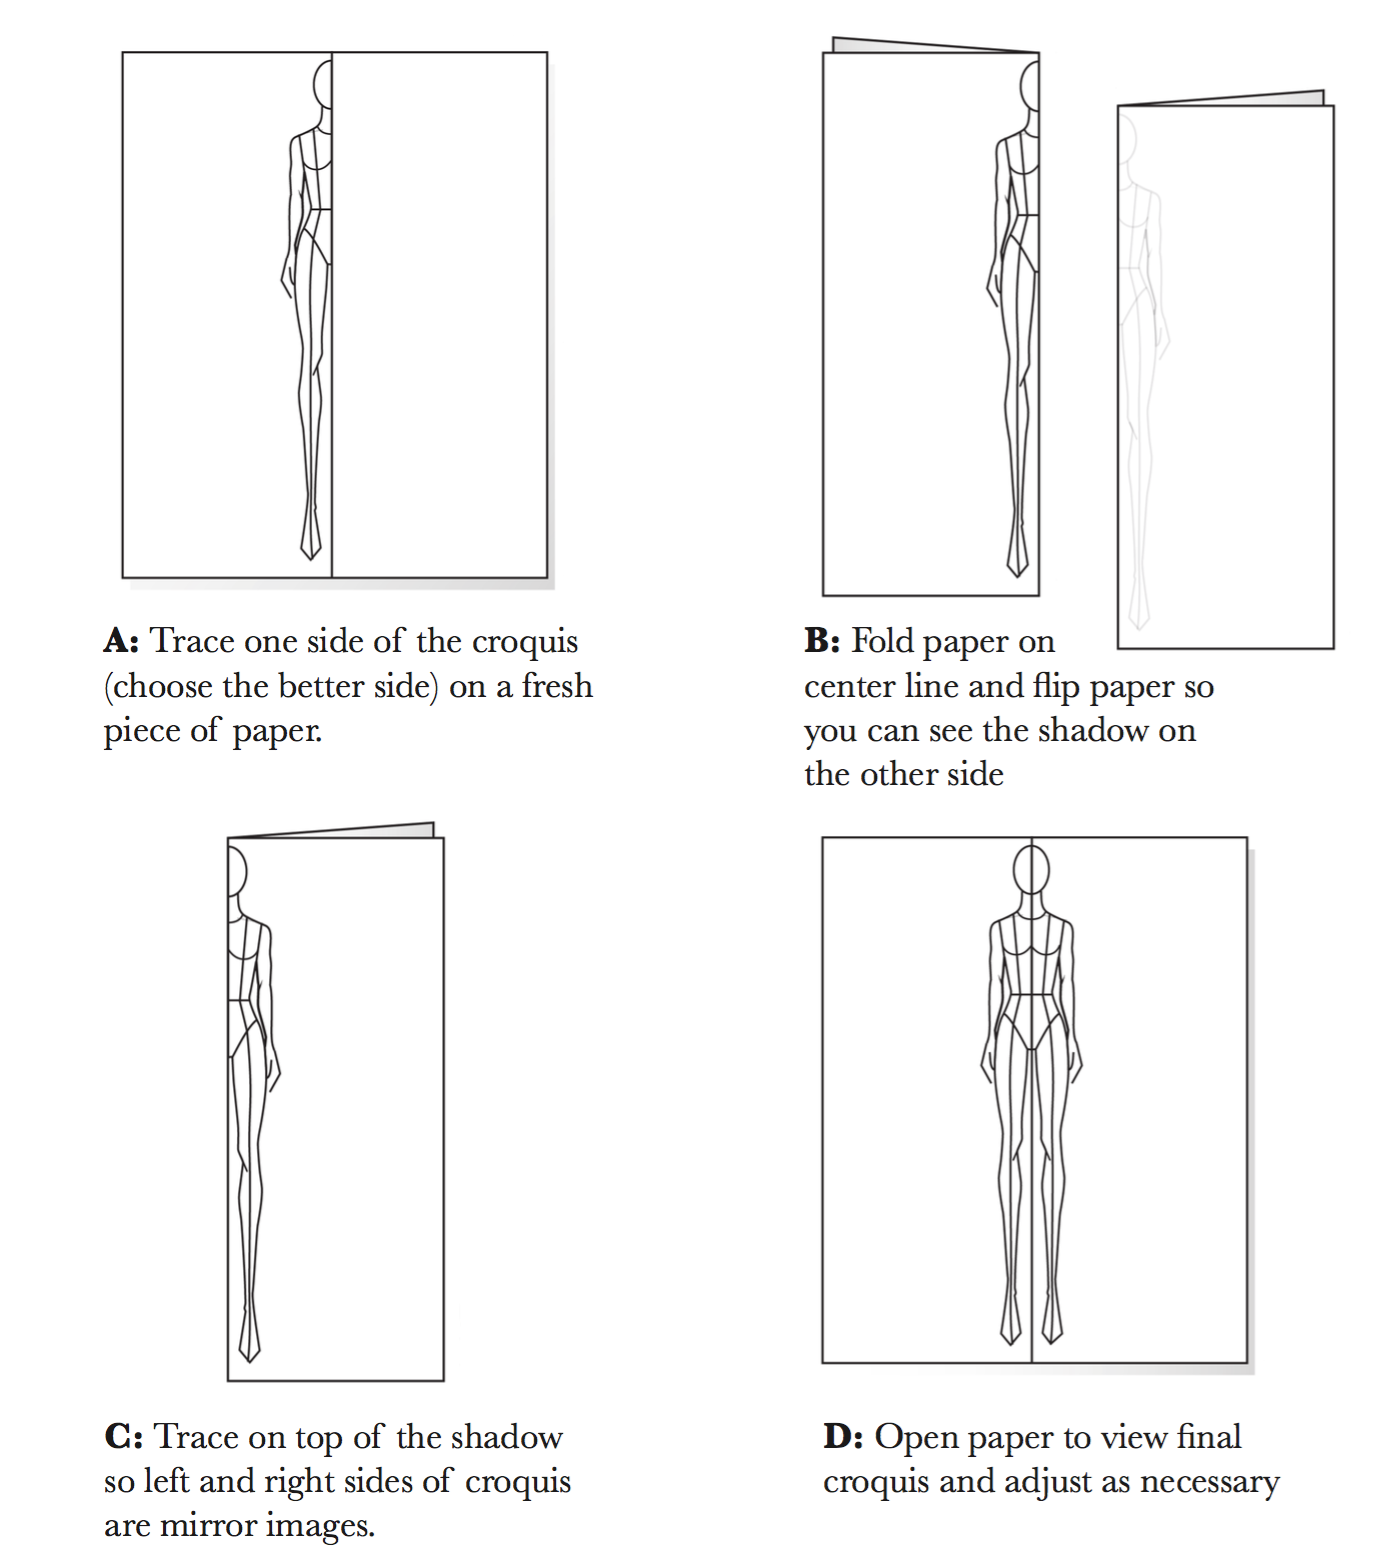
Step 8: Edit the croquis equally desired, adjusting proportions as necessary. And so follow the below steps to complete the croquis.
Both sides of the croquis should be mirror images of each other for accuracy when drawing clothes.

FREE GUIDE:
a PDF Due east-book with 5 elementary rules to depict any fashion illustration pose. This is a quick read!
DOWNLOAD HERE
How to Draw Mannequin Step by Step TUTORIAL
Posted by: sherlynantom1954.blogspot.com